
Let's be real, building a CrossFit home gym is one of the smartest investments you'll ever make. No more waiting for equipment, no more paying monthly fees to gyms that close at 9 PM, and absolutely no more dealing with the guy who doesn't rerack his weights. But here's the catch: most people hesitate because they're terrified of turning their garage, basement, or spare room into a construction zone.
Good news? You can build an absolutely killer floor to ceiling gym setup without putting massive holes in your walls or turning your landlord into your arch-nemesis. Whether you're a CrossFit athlete chasing new PRs, a ninja warrior training for the next competition, or an MMA fighter who needs serious home gym equipment that can handle punishment, this guide has you covered.
Why Floor to Ceiling Setups Dominate Traditional Home Gyms
Before we dive into the nuts and bolts, let's talk about why vertical resistance training systems are crushing it right now. Traditional home gyms eat up floor space like crazy, power racks, benches, cable machines, and all the accessories sprawl across your entire room. Floor to ceiling systems maximize vertical space, giving you the same (or better) workout potential in a fraction of the footprint.
Here's what makes these setups absolute game-changers:
Space efficiency: You're using air that was going to waste anyway. Floor to ceiling equipment lets you perform pull-ups, muscle-ups, rope climbs, and suspension training all in the same vertical column where a standard rack would only give you squats.
Versatility unleashed: The best versatile home gym setups let you transition seamlessly between strength work, bodyweight training at home, and explosive movements. Think about it, with the right floor to ceiling system, you can go from heavy squats to strict pull-ups to kipping muscle-ups without moving an inch.
No wall carnage: This is huge. Permanent wall-mounted gear requires drilling studs, patching drywall when you move, and praying you don't hit plumbing. Floor to ceiling systems use tension, not destruction, to stay rock-solid.
Measuring Your Space: The Foundation of Success
Look, you can't build what you can't measure. Before you drop a single dollar on equipment, grab a tape measure and get scientific about your space.
Ceiling height is everything. You need at minimum 7-8 feet for basic movements, but if you're serious about CrossFit training or calisthenics equipment for home, you're looking at 8-10 feet as the sweet spot. This gives you clearance for kipping pull-ups, handstand push-ups against the wall, and muscle-up progressions without scalping yourself.
Measure twice, buy once. Here's what to nail down:
- Exact floor-to-ceiling height (measure in three spots, older buildings can vary)
- Floor space width and depth in the training zone
- Distance from walls on all sides (you need 2-3 feet of clearance minimum)
- Any ceiling obstructions like lights, fans, or beams
- Floor composition (concrete, wood, carpet over concrete)
Pro tip: If you've got ceiling heights under 8 feet, don't panic. You can still build an effective setup, you'll just need to get creative with pull up bar alternatives and adjust your movement selection. Short ceilings actually work great for horizontal pulling movements and core work.
The Floor to Ceiling Revolution: Pressure-Mounted Systems
This is where things get exciting. The no wall damage workout system you've been searching for exists, and it's been hiding in plain sight.
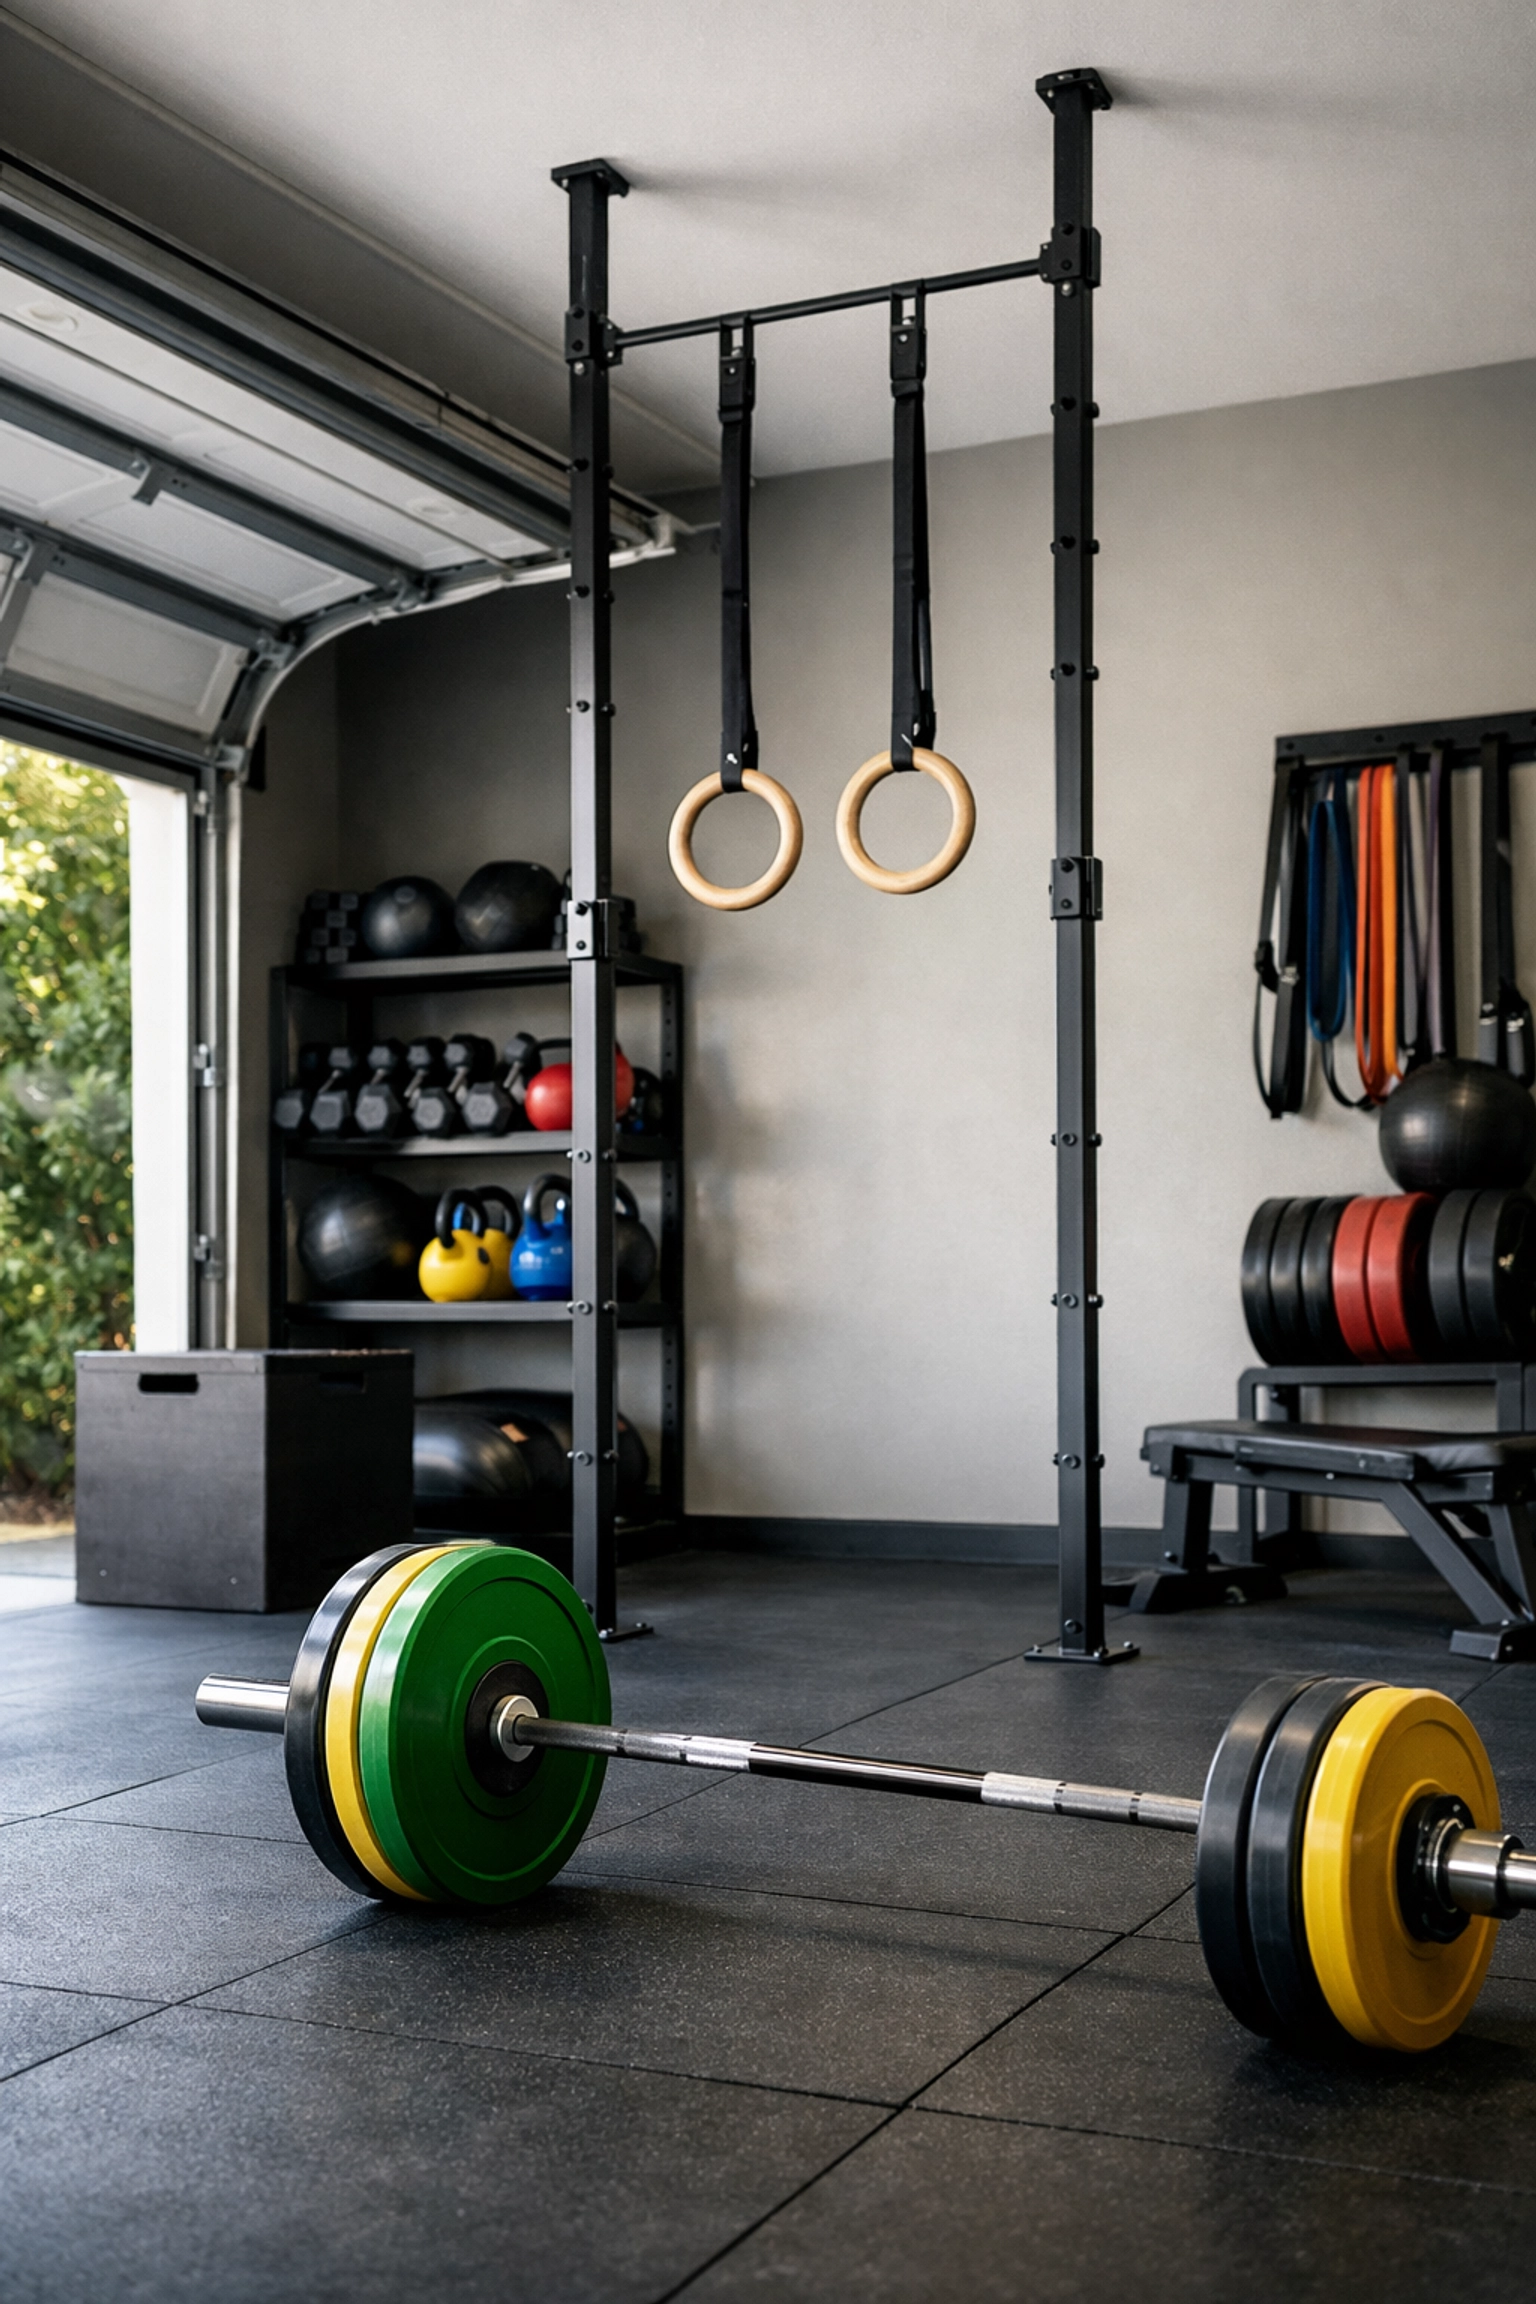
Pressure-mounted systems like the Resistance Rail from Bold Body Fitness use constant tension between floor and ceiling to create a bombproof anchor point. No drilling. No bolts. No permanent damage. Just pure physics keeping everything locked down.
Here's why this design is brilliant for CrossFit and high-intensity training:
Installation takes minutes, not hours: Forget spending your entire Saturday with a drill and a stud finder. Quality pressure-mounted systems adjust with simple mechanisms, extend the pole, crank the tension, and you're ready to throw down.
Rental-friendly: Your landlord will actually love you for this. When you move, collapse the system, pack it up, and your ceiling looks exactly like it did before. Zero deposit lost to "repairs."
Legitimate strength capacity: Don't confuse pressure-mounted with weak. Top-tier systems support 300+ pounds easily, which covers even the most aggressive kipping pull-ups, muscle-ups, and dynamic movements. This isn't your grandma's doorway pull-up bar.
The setup process is stupid simple. Position your system in the chosen spot, extend to ceiling height, and apply tension according to manufacturer specs. The friction between floor and ceiling creates a stable vertical column that rivals bolted equipment.
Building Your Complete CrossFit Home Gym Stack
Now let's build out a complete CrossFit home gym that covers all your bases without requiring a second mortgage.
The vertical anchor (your floor to ceiling system) handles all your pulling and suspension work. This is your pull-up bar, your muscle-up station, your rope climb anchor, and your suspension training point. One piece of equipment, dozens of movement patterns.
Barbell and plates: You can't CrossFit without barbells. Start with a quality 45-pound Olympic bar and bumper plates. Begin with 10s, 25s, and 45s: you can always add more weight as you progress. Budget around $400-600 for a solid starter set.
Flooring protection: This is non-negotiable. Rubber mats (3/4 inch thick minimum) protect your subfloor from dropped weights and dampen noise. Horse stall mats from farm supply stores are the secret weapon: cheaper than fitness-specific mats and just as effective. Start with four 4x6 foot mats and expand as needed.
Rings and accessories: Gymnastic rings turn your vertical anchor into an endless exercise laboratory. Add resistance bands, a jump rope, and maybe a kettlebell or two. These accessories cost under $200 total but multiply your exercise options exponentially.
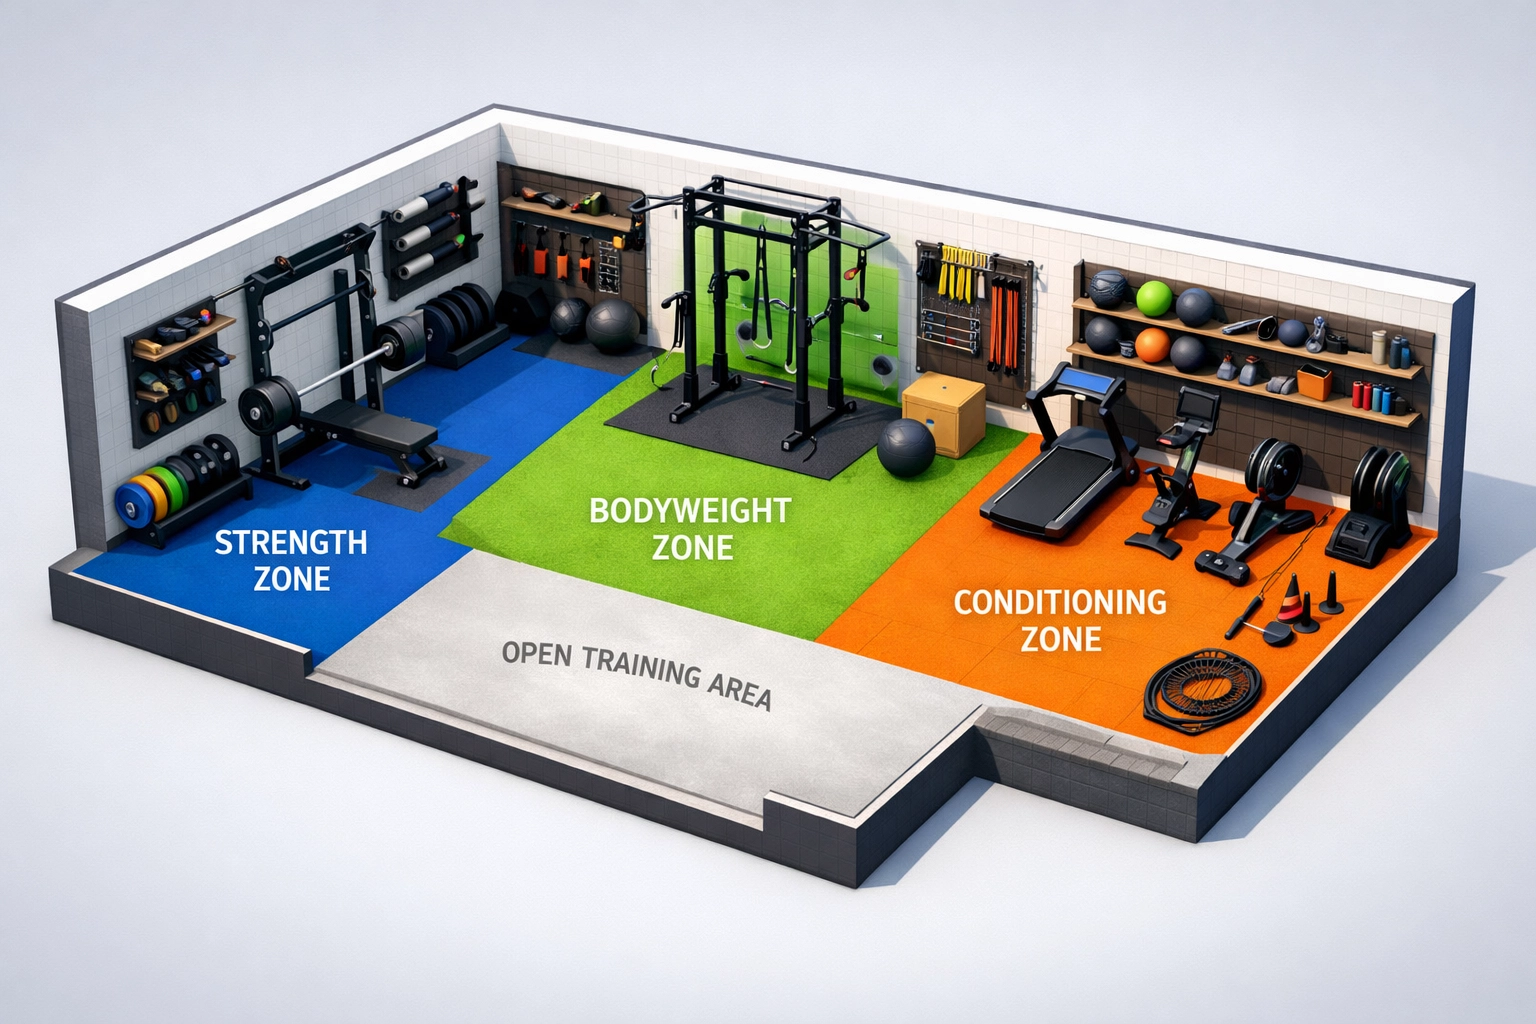
Zone Planning: Maximizing Every Square Inch
Strategic layout separates chaotic equipment graveyards from functional training spaces. Think in zones, not random placement.
Strength Zone: This is where your barbell, plates, and main lifting platform live. Position this near your floor to ceiling system so you can seamlessly transition from squats to pull-ups. Keep 6-8 feet of floor space clear for deadlifts and Olympic lifts.
Bodyweight Zone: Your vertical system is the heart of this zone. This area needs zero floor equipment: just clear space around your pull-up and suspension training station. Maintain 3 feet of clearance on all sides for kipping movements and dynamic exercises.
Conditioning Zone: Open floor space for burpees, box jumps (if you have a box), jump rope, and bodyweight metcons. This can overlap with other zones since conditioning work is mobile.
Storage Zone: Vertical storage is your friend. Wall-mounted plate storage, hooks for bands and ropes, and compact shelving for accessories keep your floor clear. The less stuff on the ground, the more room you have to actually train.
Smart layout lets you flow through workouts without constantly moving equipment. Your barbell stays loaded, your rings stay attached, and your training stays focused.
Protecting Your Walls (And Your Deposit)
Even with floor to ceiling systems, you need a defensive strategy for wall protection. Here's how to keep your training space pristine.
Strategic spacing: Keep equipment at least 2 feet from walls. This buffer zone prevents accidental impacts during dynamic movements and gives you room to actually move without feeling caged.
Foam protection: High-density foam panels on walls near your training zones act as insurance against the occasional barbell bump or wayward kettlebell. They're removable, affordable, and save you from explaining drywall damage.
Equipment placement awareness: Position your versatile home gym equipment with wall safety in mind. Barbells should be oriented away from walls during lifts. Your floor to ceiling system should have adequate clearance for full range of motion without wall contact.
Movement modification: Some exercises need adjustment in tight spaces. Wide-grip kipping pull-ups might become regular-grip in narrow rooms. Box jumps might swap for step-ups if ceiling clearance is tight. Smart athletes adapt movements to their space rather than forcing risky positions.
The Resistance Rail Advantage: Case Study in Smart Design
Let's talk specifics. The Resistance Rail system from Bold Body Fitness exemplifies what modern floor to ceiling gym equipment should be.
Zero permanent installation: The entire system relies on pressure mechanics: no drilling, no wall anchors, no permission needed from landlords or homeowners who care about resale value.
Multi-function capability: Pull-ups, chin-ups, muscle-ups, suspension training, resistance band work, rope climbs: all from one vertical column. This is the definition of a pull up bar alternative that actually exceeds traditional bars.
Built for serious athletes: When ninja warriors, CrossFit competitors, and MMA fighters test equipment, they're not gentle. The Resistance Rail handles aggressive kipping, explosive muscle-ups, and dynamic movements without wobble or shift.
Scalable difficulty: Beginners start with assisted pull-ups using bands. Advanced athletes add weighted vests and progress to one-arm variations. The system grows with you instead of becoming obsolete.
The brilliance is in the simplicity. One piece of equipment, infinite exercise variations, zero permanent damage. That's the floor to ceiling advantage.

Exercise Programming for Vertical Systems
Having equipment means nothing if you don't know how to use it. Here's how to program full body workout at home sessions using your floor to ceiling setup.
Upper body pulling days: Strict pull-ups, kipping pull-ups, chest-to-bar pull-ups, muscle-ups, ring rows, face pulls with bands. Your vertical system becomes a back-building machine.
Core and grip strength: Hanging knee raises, toes-to-bar, windshield wipers, L-sits on rings, dead hangs for time. These exercises destroy your core and build ninja-warrior-level grip strength.
Conditioning circuits: Combine pull-ups with burpees, barbell work, and jump rope. Your floor to ceiling system integrates seamlessly into metabolic conditioning work that leaves you gasping.
Skill development: Practice kipping mechanics, muscle-up transitions, rope climbs, and advanced gymnastics progressions. Having consistent access to equipment accelerates skill development because you can practice daily instead of fighting for gym equipment.
Sample workout: "Nasty Nancy"
- 5 rounds for time:
- 10 pull-ups (on your Resistance Rail)
- 15 barbell thrusters (75/55 lbs)
- 20 box jumps or step-ups
- Rest 1 minute between rounds
This hits everything: pulling strength, barbell cycling, leg power, and cardiovascular conditioning: all in your home gym.
Advanced Setup: Adding Accessories That Matter
Once your foundation is solid, strategic accessories take your calisthenics equipment for home to the next level.
Gymnastic rings: The ultimate versatile tool. Rings add instability that forces stabilizer engagement and allows for natural movement paths that fixed bars can't match. Hang them from your floor to ceiling system and unlock ring dips, ring push-ups, iron cross progressions, and more.
Resistance bands: Variable resistance for assisted pull-ups, added resistance to push-ups, mobility work, and shoulder prehab. A set of bands costs under $50 but multiplies your exercise library.
Climbing rope: If ceiling height allows, a climbing rope turns your vertical system into a full-body conditioning tool. Rope climbs build grip, arm, and lat strength while torching calories.
Ab straps: Hanging ab work becomes infinitely more comfortable with proper straps. Your hip flexors will thank you.
Don't buy everything at once. Start with your core setup, train for a month, then add accessories based on your actual needs rather than theoretical wants.
Common Mistakes to Avoid
Learn from others' failures so you don't repeat them.
Skipping floor protection: Dropping weights on bare concrete damages both the weights and the floor. Worse, it's loud enough to make neighbors consider calling the police. Invest in proper flooring from day one.
Insufficient ceiling height measurement: Nothing hurts worse than setting up equipment only to realize you can't actually perform full range of motion movements. Measure accurately and account for your own height plus movement extension.
Overcrowding the space: More equipment doesn't equal better workouts. A minimalist setup you actually use destroys a cluttered gym you avoid. Start lean, add deliberately.
Neglecting maintenance: Inspect your floor to ceiling system monthly. Check tension, look for wear points, and ensure stability. Five minutes of maintenance prevents catastrophic failure mid-workout.
Ignoring noise management: If you train early or late, consider neighbors. Rubber flooring helps, but also learn to control weight descent and avoid unnecessarily dropping bars.
Making It Official: Your Action Plan
You've got the knowledge. Now execute.
Week 1: Measure your space thoroughly. Determine exact ceiling height, floor dimensions, and clearance zones. Sketch a basic layout showing equipment placement.
Week 2: Order your floor to ceiling system and foundational flooring. The Resistance Rail ships fast and installs in minutes, so timing this with flooring arrival keeps momentum high.
Week 3: Install flooring and set up your vertical system. Test stability with bodyweight exercises before adding accessories or weights.
Week 4: Add barbell, plates, and basic accessories. Begin programming actual workouts instead of random exercise sessions.
Week 5 and beyond: Train consistently, track progress, and add accessories as specific needs emerge. Your home gym evolves with your fitness journey.
The Bottom Line on Floor to Ceiling Excellence
Building a no wall damage workout system isn't just possible: it's the smartest way to create a versatile home gym that actually fits your life. Floor to ceiling setups maximize vertical space, minimize footprint, and deliver professional-grade training without permanent installation nightmares.
Whether you're a CrossFit athlete chasing new PRs, a gymnast working on skill progressions, or a ninja warrior training for competition, the right floor to ceiling system transforms any space into a legitimate training facility. No gym membership required. No commute necessary. No excuses accepted.
The future of home gym equipment is vertical, versatile, and damage-free. Your walls will thank you. Your landlord will thank you. And your fitness gains will speak for themselves.
Ready to build your floor to ceiling gym? Check out the complete Bold Body Fitness equipment lineup and start training like the athlete you're meant to be.