

Listen up: If you're training to dominate obstacle courses, crush bodyweight movements, or just build the kind of functional strength that actually matters in the real world, you need the right tools. The good news? You don't need a commercial gym or thousands of dollars in equipment. The bad news? Most "home gym guides" are written by people who've never swung from a salmon ladder or powered through a muscle-up.
This isn't that guide.
Whether you're a ninja warrior hopeful, a gymnast training at home, or someone who just wants to move like an athlete instead of looking like a bodybuilder, this breakdown covers exactly what you need: and what you can skip.
The Non-Negotiable Foundation: Pull-Up Power
Let's start with the obvious: you absolutely need a way to do pull-ups. Not "eventually." Not "when you get stronger." Right now.
Pull-ups are the single most important movement pattern for developing the pulling strength required in obstacle course racing, gymnastics, and functional fitness. They hit your lats, biceps, forearms, and core simultaneously: exactly the muscle groups you need for rope climbs, pegboards, and cliffhangers.
But here's where most people get it wrong: they grab a cheap doorframe pull-up bar from a big-box store and call it a day. Those work fine if you're just starting out, but they severely limit your progressions. You can't do muscle-ups. You can't hang rings. You can't practice dynamic movements without worrying about ripping the thing off your doorframe.
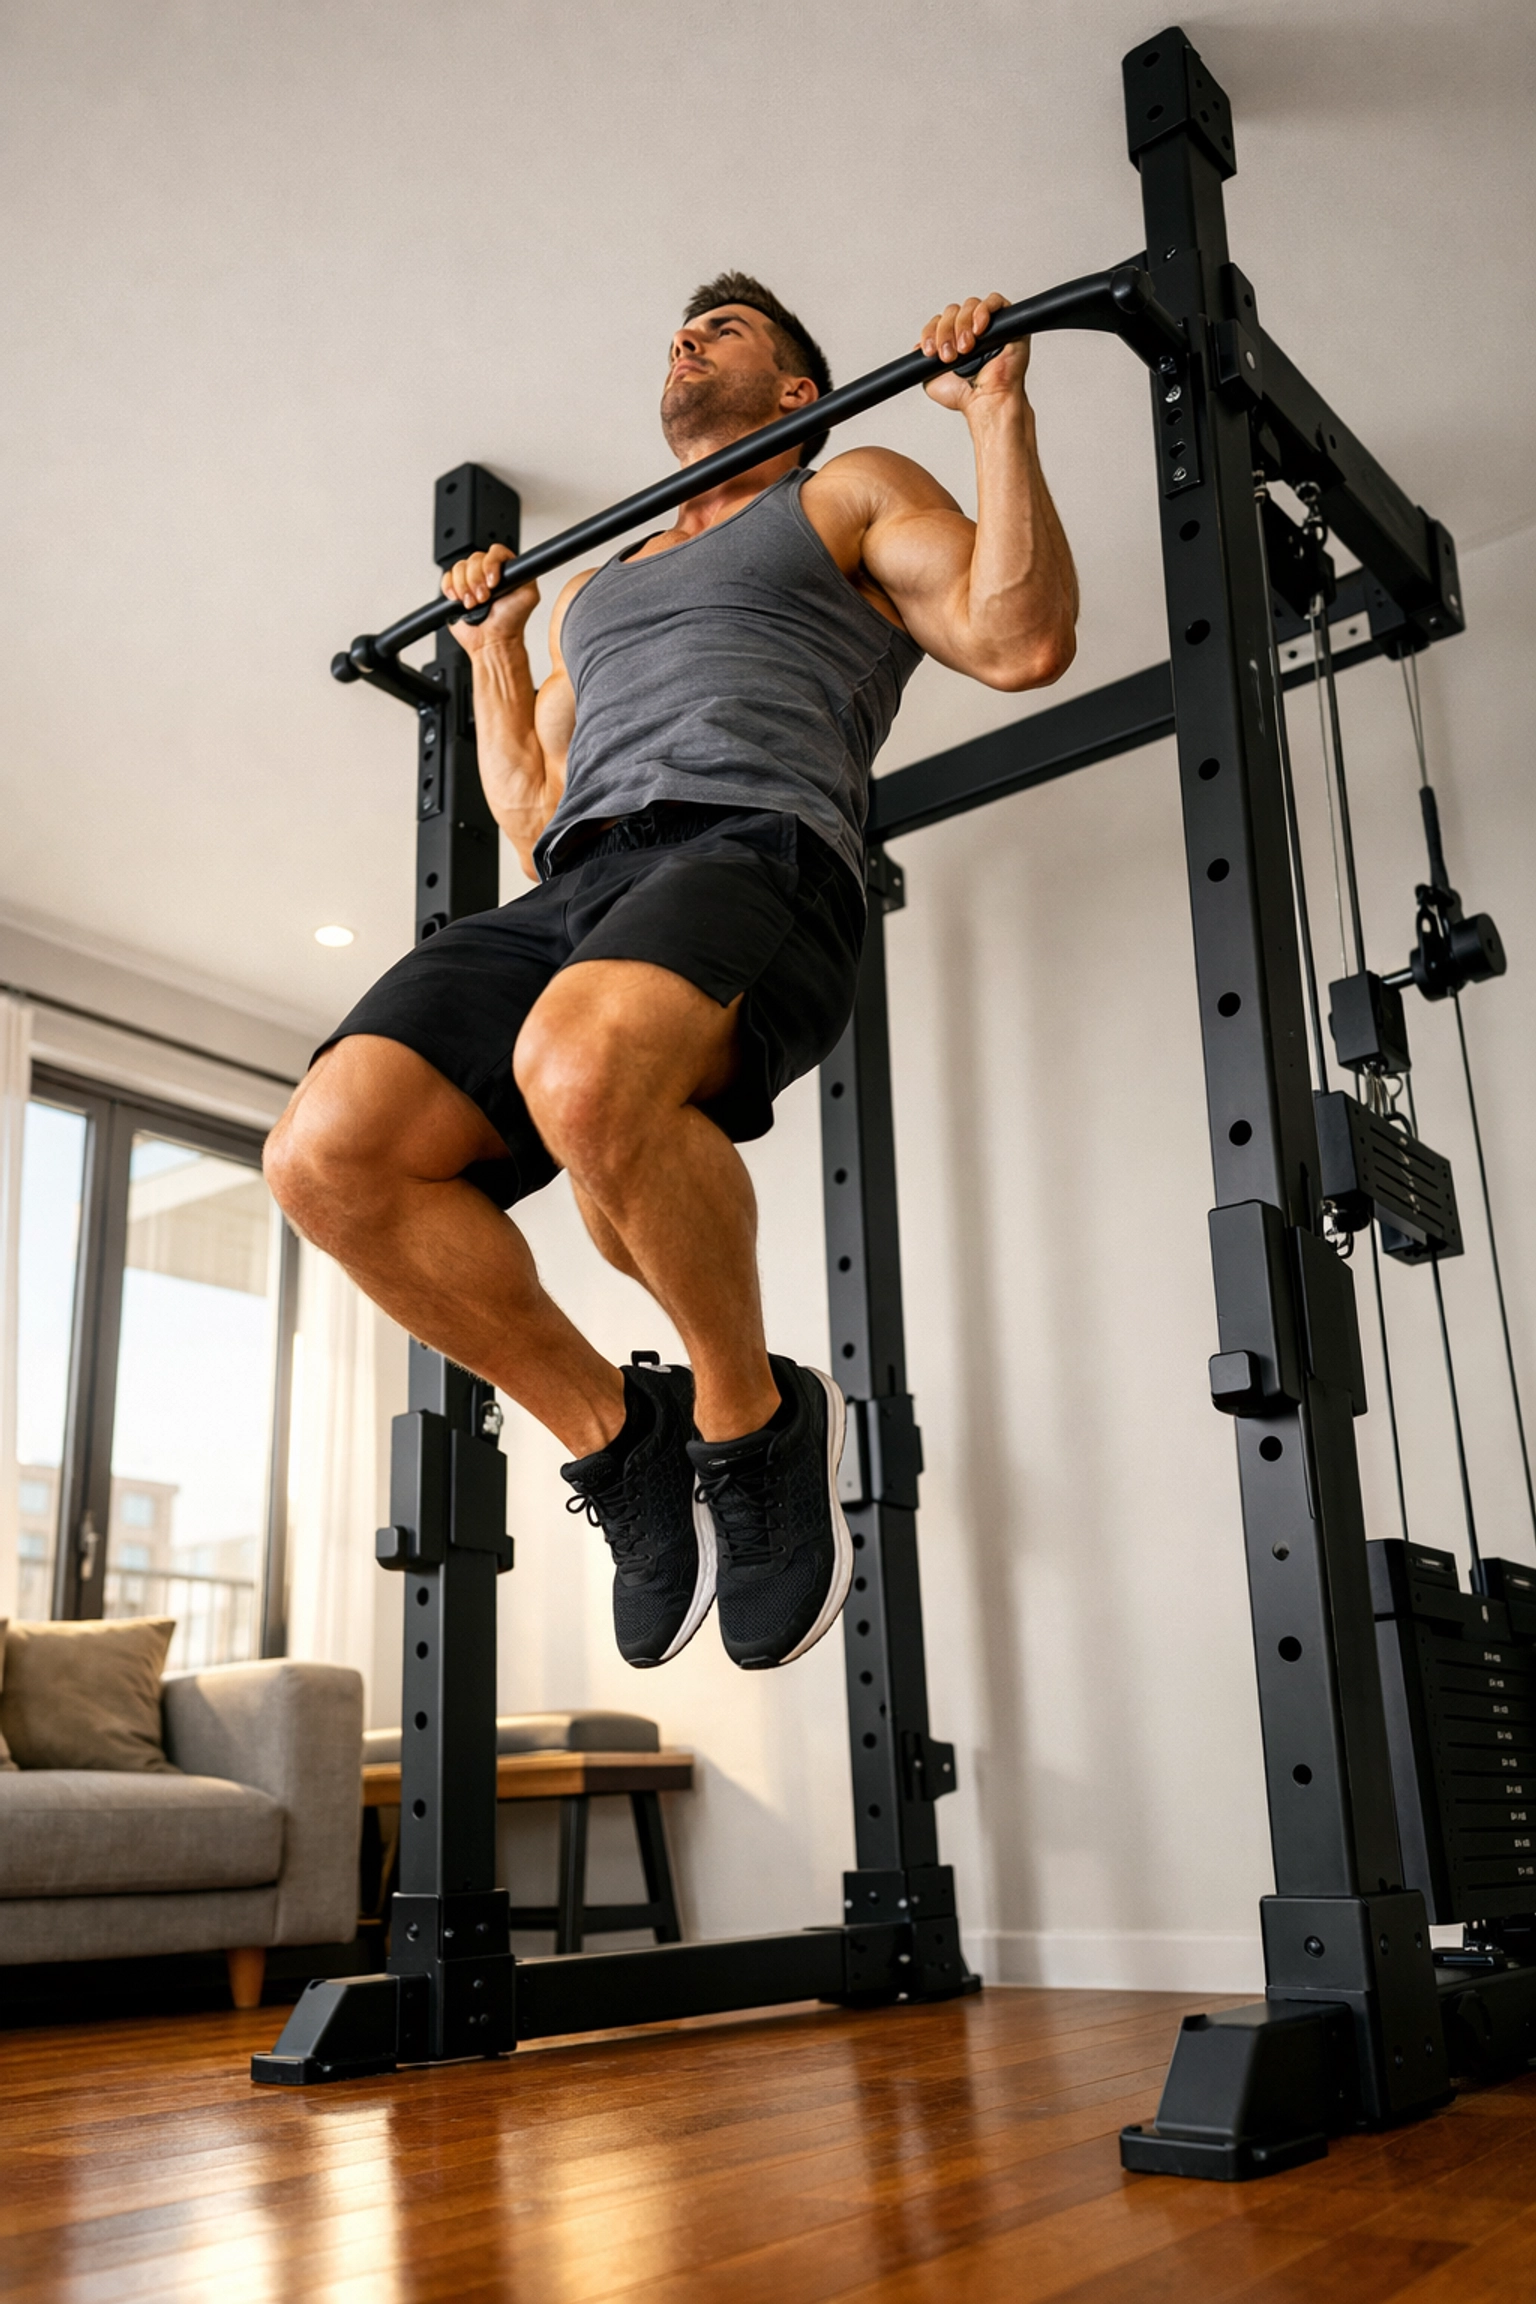
The smarter play? Go with a floor-to-ceiling system like the Resistance Rail from Bold Body Fitness. Unlike wall-mounted bars that require drilling into studs (and leave holes when you move), a tension-based system gives you a full pull-up bar, ring attachment points, and resistance band anchor spots: all without damaging your walls. Perfect for renters, apartment dwellers, or anyone who doesn't want their home to look like a CrossFit box exploded in it.
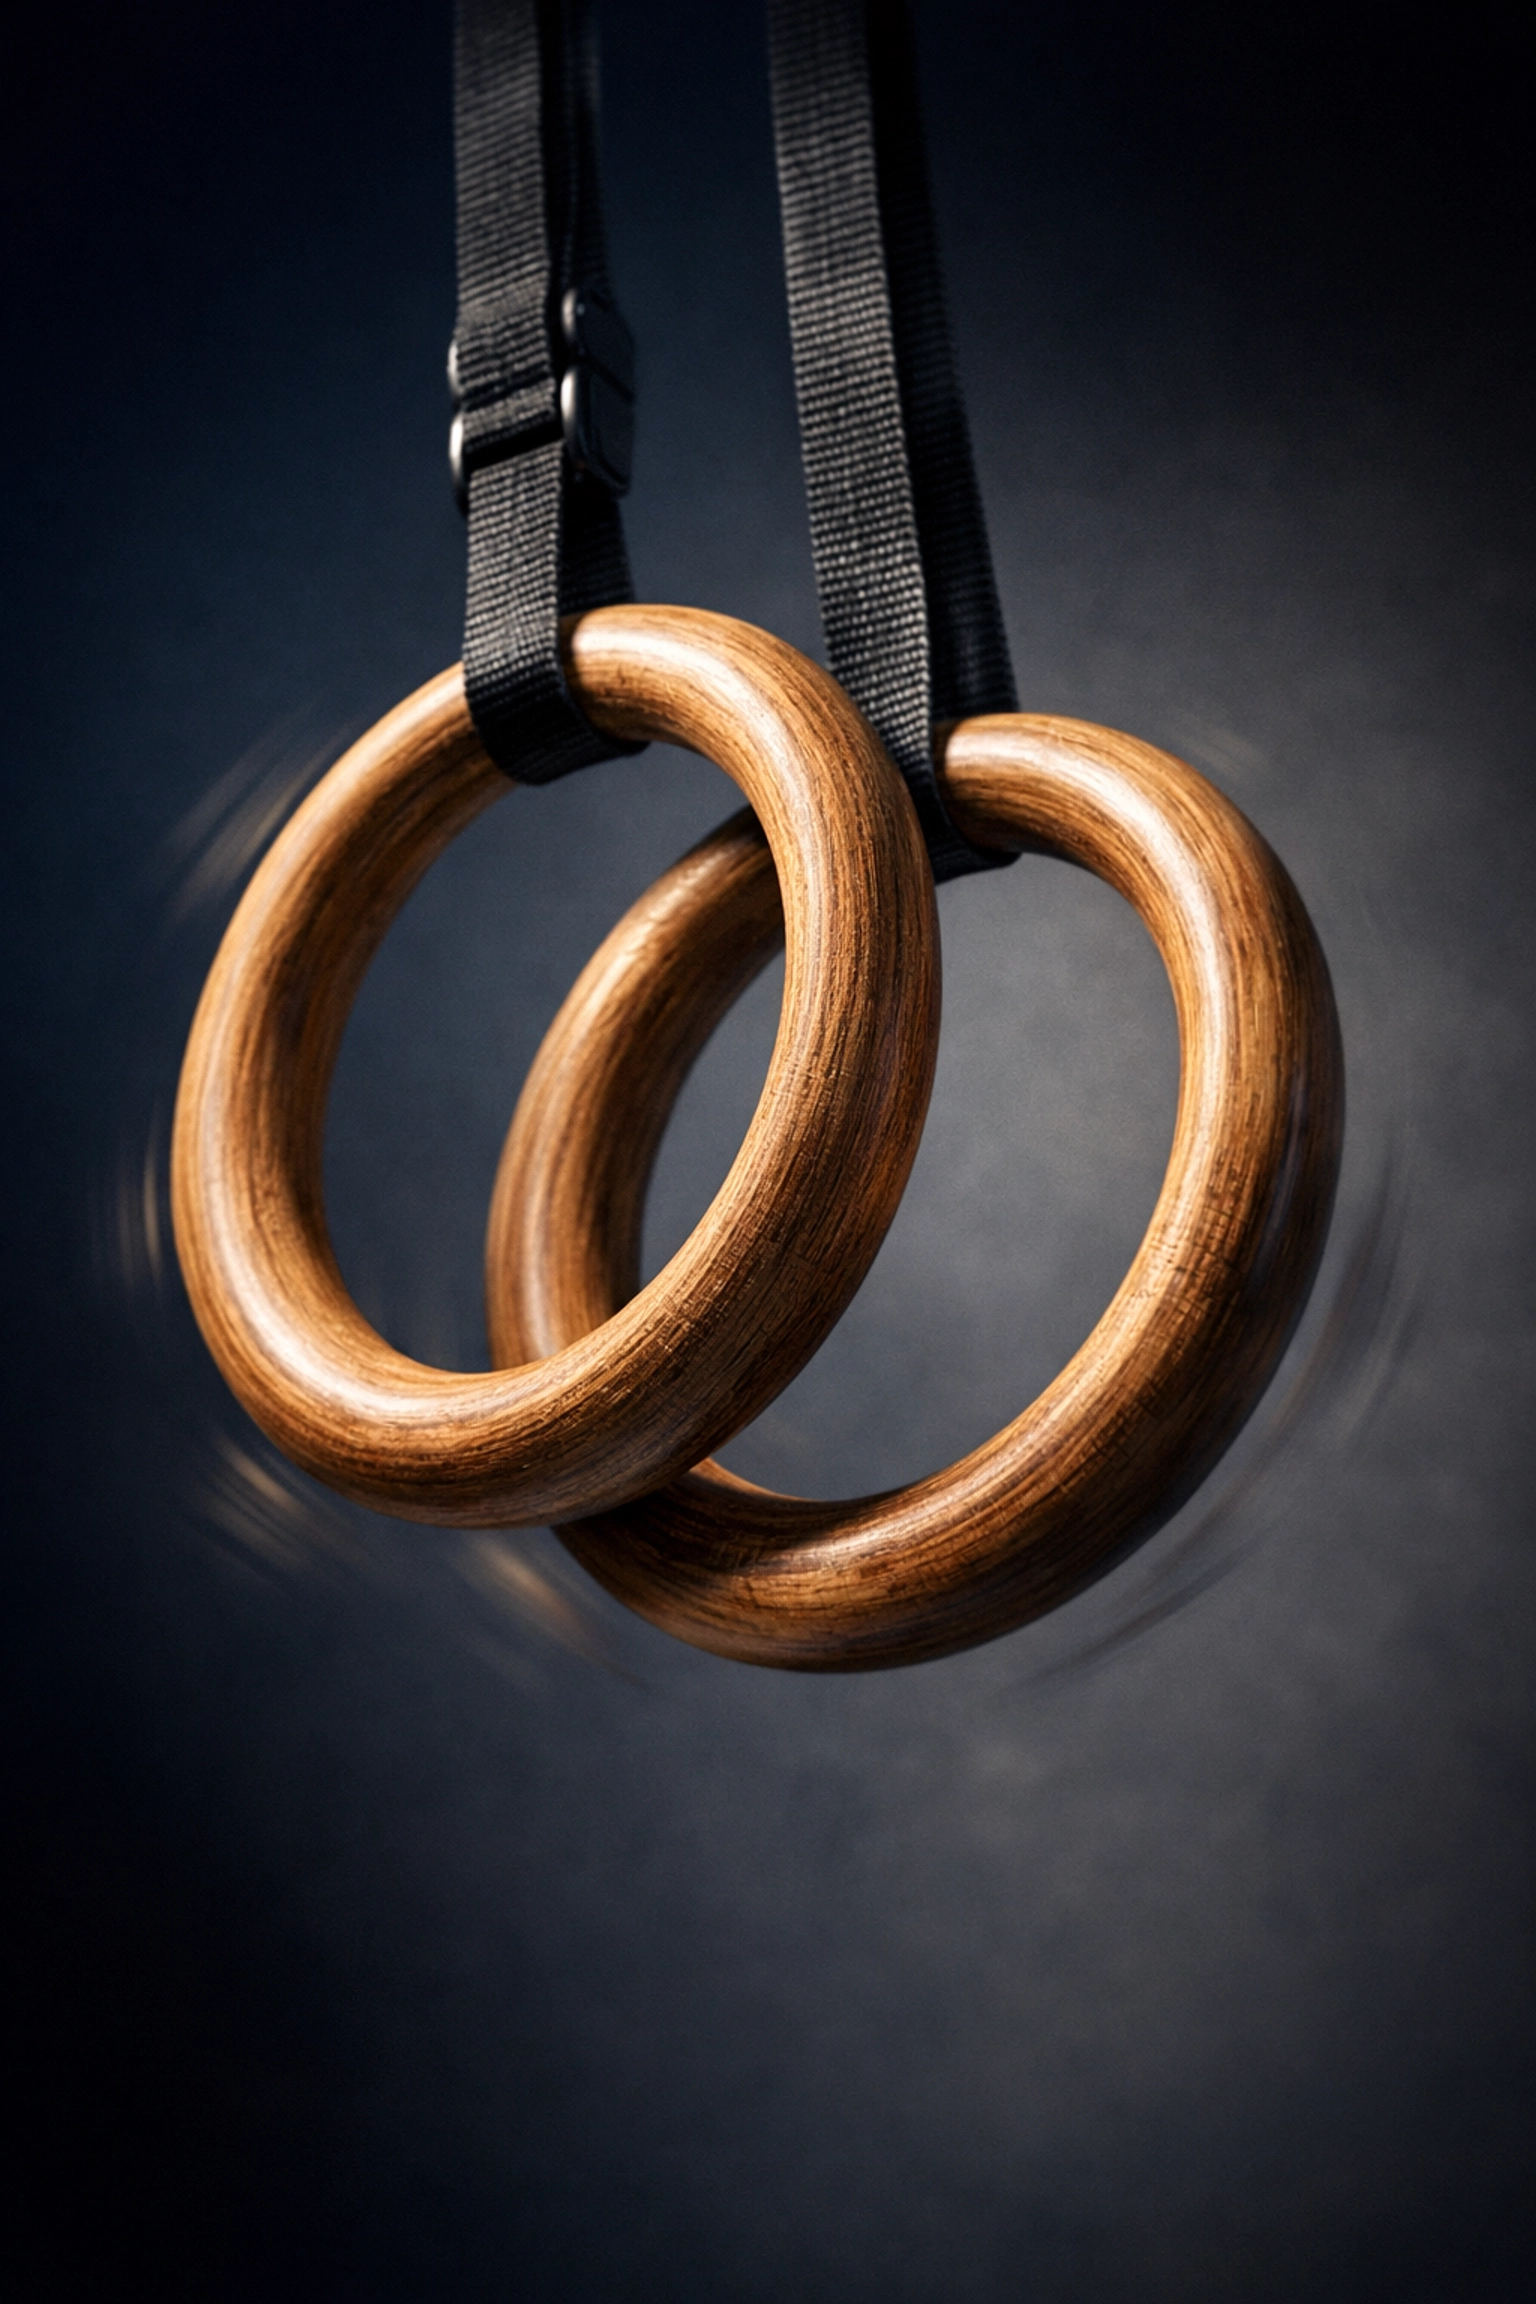
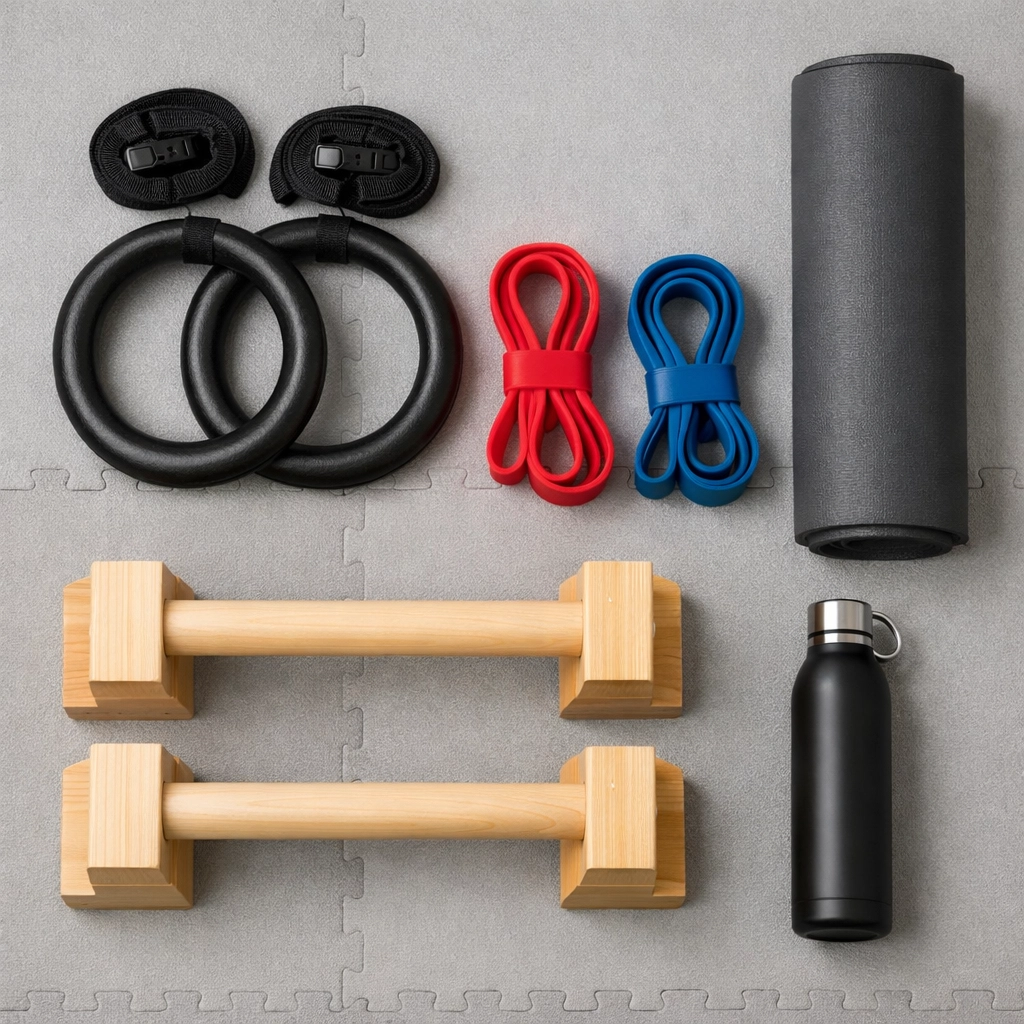
Rings: The Most Underrated Tool in Your Arsenal
If you're serious about calisthenics, gymnastic rings are non-negotiable. They're often called "the beast of all calisthenics equipment," and for good reason: the instability forces your stabilizer muscles to fire on every rep, building real-world strength that translates directly to ninja warrior obstacles.
Rings enable:
- Ring dips (harder than bar dips, better carryover to muscle-ups)
- Ring rows (the perfect pull-up progression that hits your back from different angles)
- False grip training (essential for muscle-ups and advanced gymnastics)
- Ring push-ups (chest and tricep destroyer with built-in instability)
- Skin-the-cats (shoulder mobility and strength rolled into one brutal movement)
The beauty of rings is their versatility. Hang them high for pull-ups and muscle-ups. Drop them low for push-ups and rows. Adjust them mid-workout for supersets. They're also dirt cheap compared to other equipment: a quality set runs about $30-50: and they pack down to nothing for travel or storage.
Pro tip: If you're using a floor-to-ceiling system, you already have the perfect anchor point. Just clip your rings to the bar and you're good to go. No ceiling hooks, no tree branches, no sketchy playground equipment required.
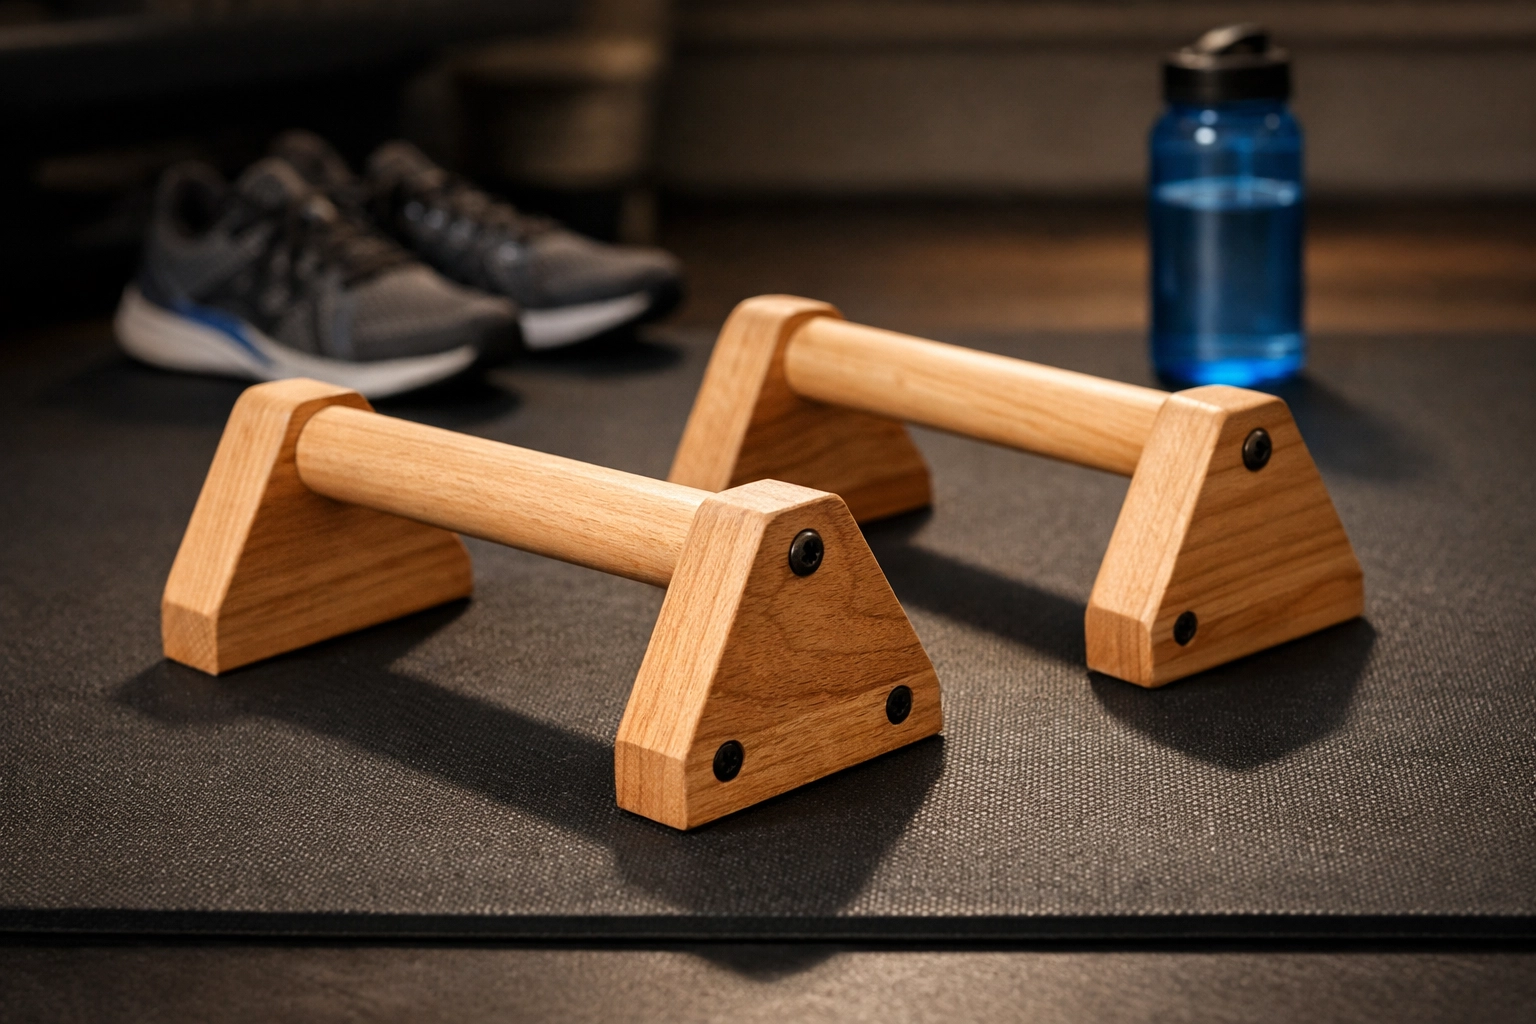
Parallettes: From Handstands to L-Sits
Parallettes are essentially mini parallel bars that sit on the ground. They look simple: almost too simple: but they unlock an entirely new category of movements:
- L-sits (brutal core strength that translates to hanging obstacles)
- Handstand push-ups (shoulder strength without the fear of face-planting from full height)
- Planche progressions (if you're chasing advanced skills)
- Elevated push-up variations (deeper range of motion = more muscle recruitment)
For ninja warriors specifically, parallettes build the kind of grip endurance and forearm strength you need for hanging obstacles like the Flying Bar or Floating Steps. The constant tension on your hands during L-sits mimics the grip demands of competition obstacles.
They're also perfect for developing the body awareness required for dynamic movements. Learning bent-arm handstands on parallettes is safer than going straight to the wall because you're closer to the ground. Once you can hold a solid handstand on parallettes, moving to free-standing handstands becomes exponentially easier.
Resistance Bands: The Swiss Army Knife of Progression
Resistance bands might look like glorified rubber, but they're one of the most versatile tools in your home gym arsenal. They serve three critical functions:
-
Assistance for skill development – Loop a band around your pull-up bar and step into it to offset some of your bodyweight. This lets you practice muscle-ups, high-volume pull-ups, or explosive movements before you can do them unassisted.
-
Progressive resistance – Unlike free weights, bands create variable resistance: the stretch increases as you pull, making movements harder at peak contraction. This is perfect for targeting specific weak points in your range of motion.
-
Mobility and warm-up – Bands are clutch for shoulder dislocates, band pull-aparts, and other prehab work that keeps your joints healthy during high-volume training.
Loop bands (continuous circles) are more versatile than bands with handles. You can anchor them to your floor-to-ceiling system for horizontal presses, face pulls, and rotational core work. For ninja warriors, bands are essential for training explosive power: use them for banded jumps, speed pull-ups, and plyometric variations that mimic competition obstacles.
Dip Bars: Building Pushing Power
While pull-ups handle your pulling strength, dip bars are the king of pushing movements for calisthenics. Standard dips hit your triceps, chest, and shoulders hard, but the variations are where things get interesting:
- Straight bar dips – More tricep-focused, perfect for lockout strength
- Ring dips – Unstable, brutal, effective
- Korean dips – Advanced variation that builds pressing power from unusual angles
- Support holds – Static strength that carries over to handstands and planches
If you're working with limited space or budget, you can actually skip standalone dip bars and use your parallettes or rings instead. Both provide similar stimulus, and rings are actually harder due to the instability factor.
For those using a floor-to-ceiling gym system, some models include dip bar attachments that slide on and off the main rail. This gives you dedicated dip station functionality without requiring a separate piece of equipment eating up floor space.
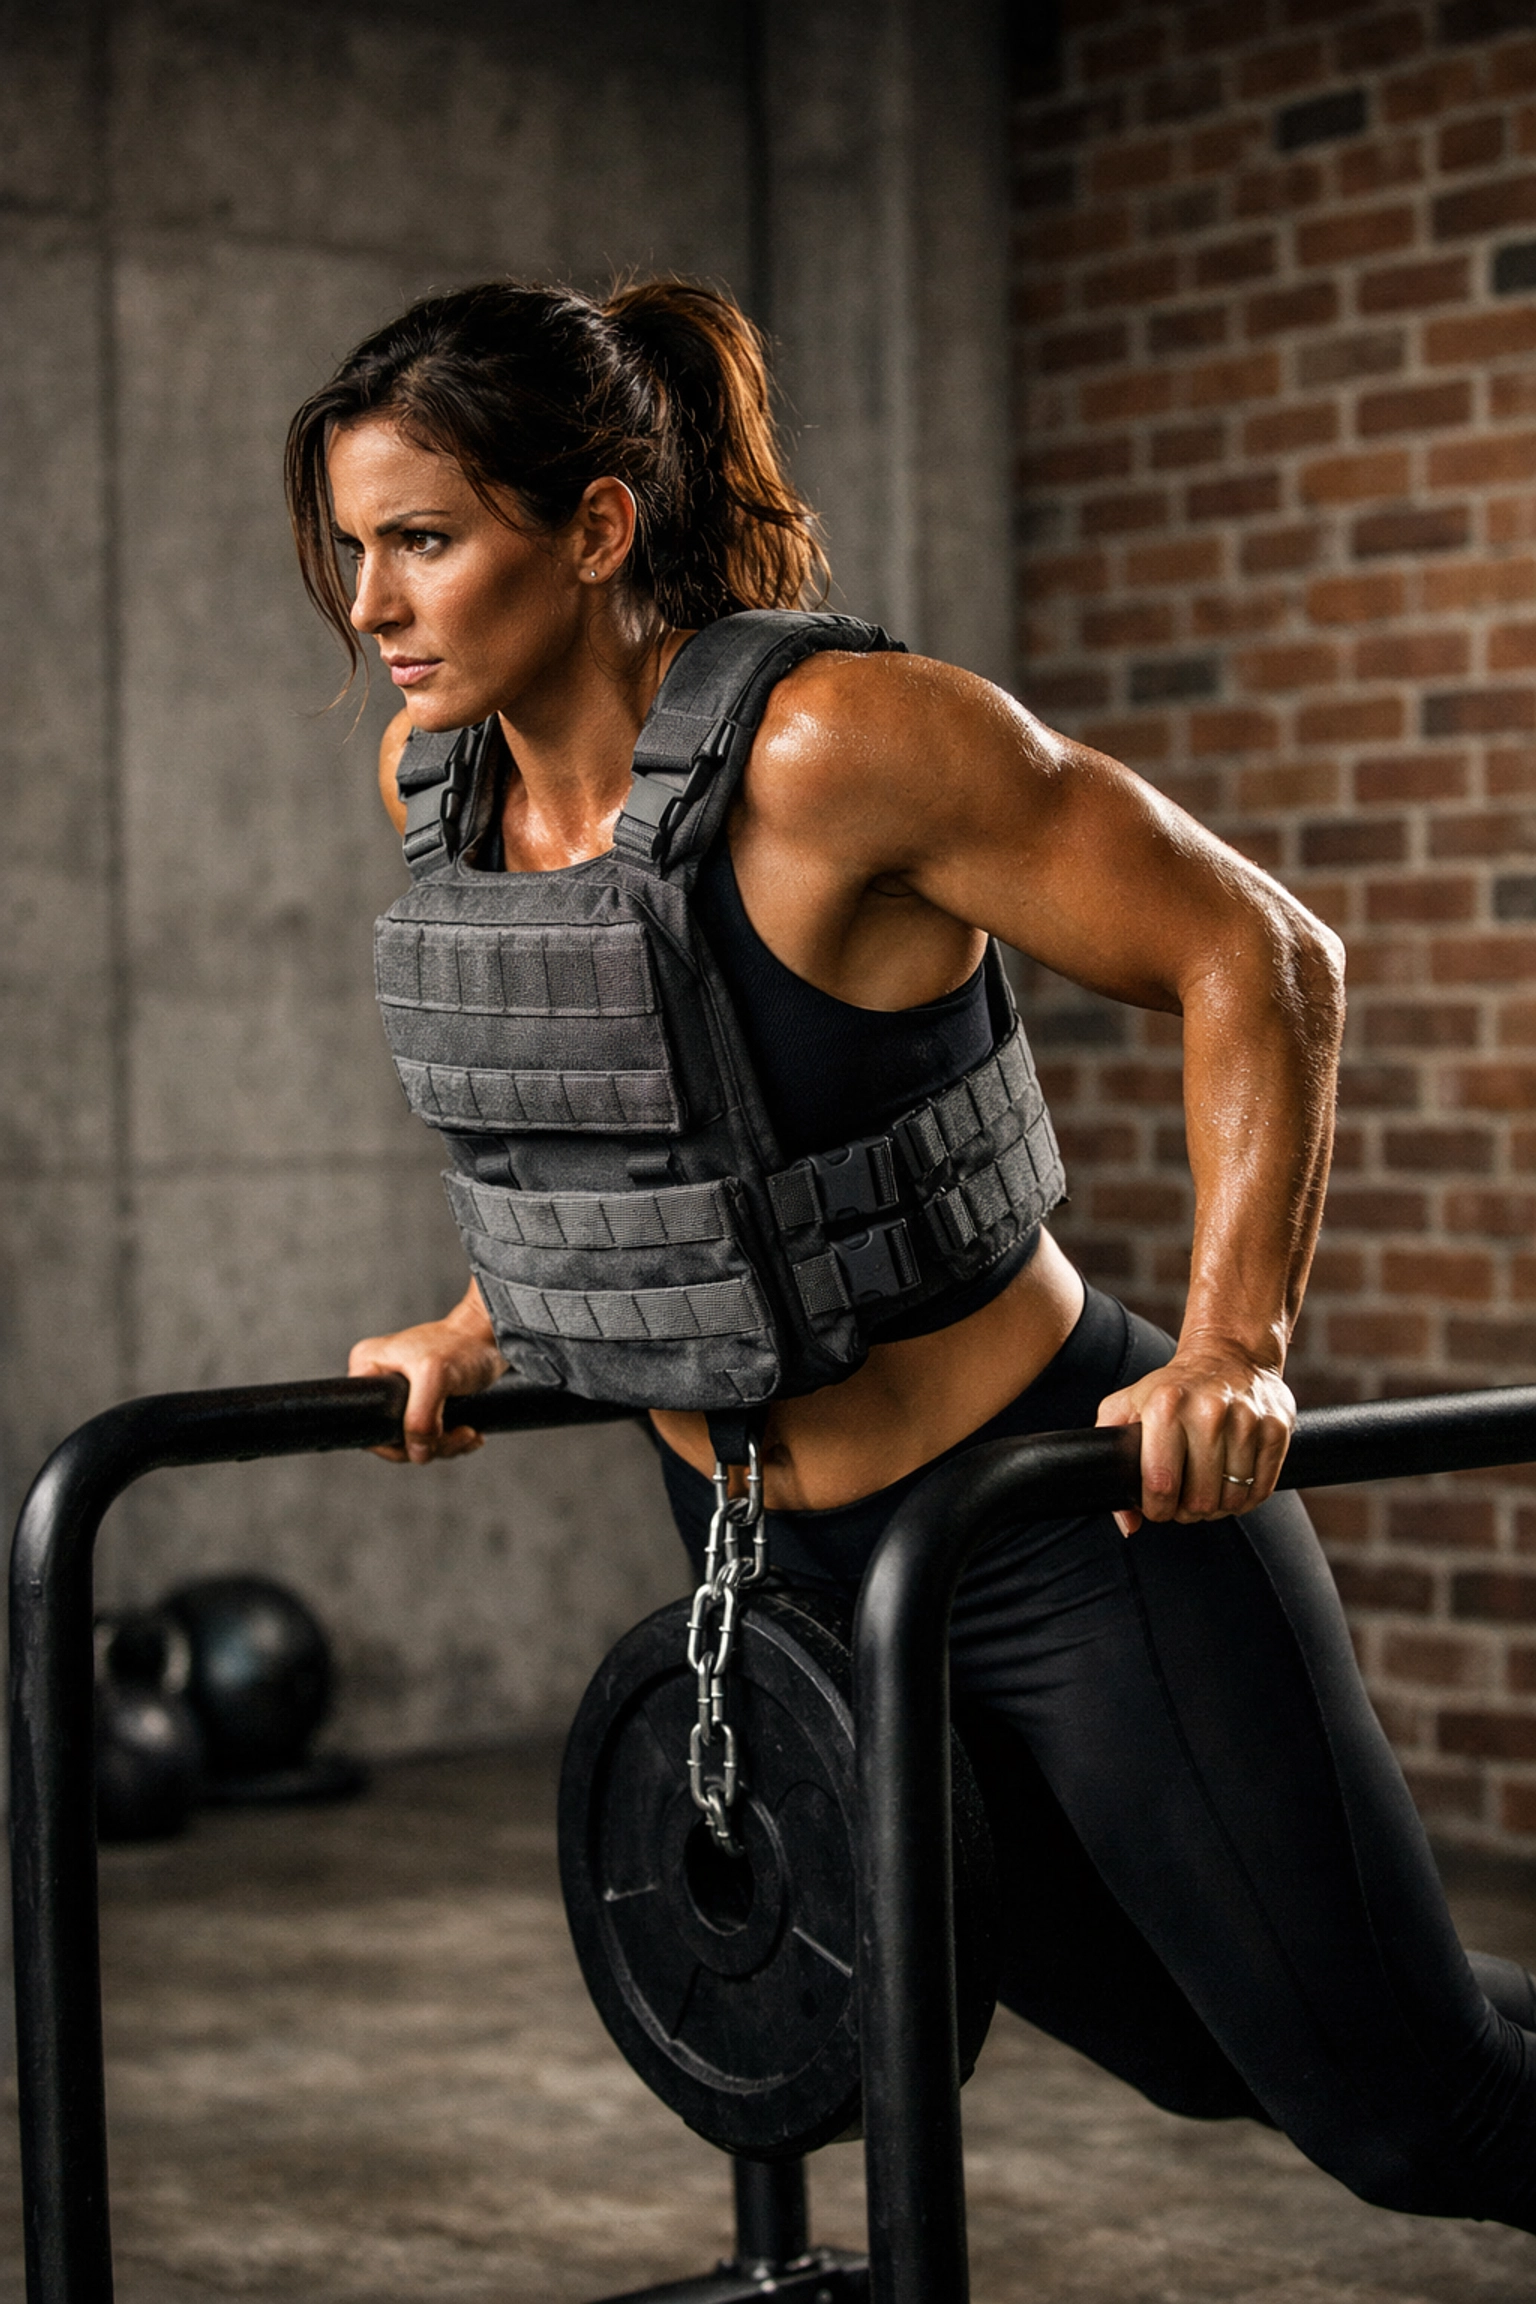
The Weight Vest Question: When to Add External Load
Here's the truth about weighted calisthenics: most people add weight way too early. If you can't do 20+ clean pull-ups or 30+ dips with perfect form, you don't need a weight vest yet. Focus on progressive overload through harder variations first: archer pull-ups, typewriter pull-ups, one-arm negatives, etc.
That said, once you've built a solid foundation, a weight vest becomes a valuable tool for strength and muscle development. Adding 10-20 pounds to your pull-ups, dips, and push-ups provides the progressive overload necessary to keep making gains beyond bodyweight limits.
For ninja warriors specifically, weighted training improves your power-to-weight ratio. Training with extra load makes your bodyweight movements feel easier during competition: like taking the training wheels off, but in reverse.
Alternative to a vest: a dip belt with weight plates. Cheaper, more adjustable, and easier to load progressively. The downside is it only works for vertical movements (pull-ups, dips, muscle-ups). For weighted push-ups and dynamic movements, a vest wins.
The Floor Protection Factor: Mats Matter
Let's talk about something boring but necessary: exercise mats. Not the thin yoga mats your girlfriend uses, but actual protective flooring.
Quality mats serve three purposes:
- Floor protection – Drop into a burpee or bail from a handstand without destroying your hardwood floors
- Noise reduction – Critical if you're training in an apartment
- Joint cushioning – Your wrists, elbows, and knees will thank you during high-volume sessions
Puzzle mats (the interlocking foam squares) are the budget-friendly option. Horse stall mats (¾-inch rubber) are the nuclear option: damn near indestructible, but heavy and expensive. For most home setups, a few puzzle mats in your training area do the job.
The Space-Saving Setup: Maximum Training, Minimum Footprint
Let's be real: most people don't have 500 square feet to dedicate to a home gym. If you're training in an apartment, spare bedroom, or garage corner, here's the minimalist-but-complete setup:
- Floor-to-ceiling pull-up system (like the Resistance Rail: no wall mounting required)
- Gymnastic rings (clip onto your pull-up bar)
- Resistance bands (loop over the bar or anchor low for rows)
- Parallettes (stackable, slide under your bed when not in use)
- Exercise mat (rolls up in 30 seconds)
Total footprint when set up: about 6x6 feet. Total footprint when packed away: basically nothing. Total functionality: complete upper body, core, and lower body (pistol squats, lunges, explosive movements) training.
The key advantage of systems like the Resistance Rail from Bold Body Fitness is the no-damage installation. Tension between floor and ceiling means you can set it up in 10 minutes and take it down just as fast. For renters or people who move frequently, this is the difference between training consistently and letting your fitness slide because your landlord won't let you drill holes.
Ninja Warrior-Specific Training Considerations
If you're specifically training for ninja warrior competitions or obstacle course racing, your equipment choices should prioritize:
Grip endurance – Use thick pull-up bars or add Fat Gripz to your existing bars. Train hanging holds, dead hangs, and towel pull-ups to build crushing grip strength.
Dynamic pulling – Work explosive pull-ups, clapping pull-ups, and muscle-up variations. Competitions don't give you time for slow, controlled reps: you need explosive power.
Core stability under load – L-sits, toes-to-bar, hanging knee raises. Your core needs to stay rock-solid while your arms are getting smoked on hanging obstacles.
Specific obstacle practice – If you have the space and budget, consider adding a salmon ladder setup or pegboard. These are advanced additions after you've nailed the fundamentals, but they provide competition-specific practice you can't get anywhere else.
The Progressive Training Path
Here's how to structure your equipment purchases if you're starting from zero:
Month 1-2: Core Foundation
- Pull-up bar or floor-to-ceiling system
- Resistance bands for assistance
- Exercise mat
Focus on basic pull-ups, push-ups, rows, and core work. Build your base strength and movement patterns.
Month 3-4: Add Variety
- Gymnastic rings
- Parallettes
Now you can train ring variations, work L-sits, and progress toward muscle-ups and handstands.
Month 5-6: Specialize
- Weight vest or dip belt (if strength is your goal)
- Competition-specific obstacles (if ninja warrior is your path)
By this point, you have everything you need for years of progressive training. The equipment becomes your constraint: your dedication determines how far you go.
Why The Resistance Rail Changes The Game
Look, we need to address the elephant in the room: most home calisthenics setups are either permanent installations that destroy your walls, or they're flimsy doorframe bars that limit your progressions.
The Resistance Rail solves both problems. It's a tension-based floor-to-ceiling system that installs without drilling, holds serious weight (we're talking muscle-ups, weighted pull-ups, the works), and gives you multiple attachment points for rings, bands, and other accessories.
For serious athletes training at home: especially renters who move every year or two: this is the difference between a legitimate training setup and a compromise. Check out the full range of options at Bold Body Fitness to see how it fits your specific space and training goals.
The Bottom Line
Building a home calisthenics setup that actually supports ninja warrior-level training doesn't require a massive budget or dedicated gym space. What it requires is smart equipment choices that prioritize versatility, progressive overload, and long-term functionality.
Start with a solid pull-up solution, add rings and bands, throw in some parallettes, and protect your floors. That's the foundation. Everything else: weight vests, specialized obstacles, advanced tools: comes after you've mastered the basics and proven you're committed to the process.
The athletes crushing it at ninja warrior competitions aren't training in commercial gyms with $100,000 in equipment. They're training in garages, backyards, and spare bedrooms with the same basic tools we've covered here. The difference isn't the equipment: it's the consistency and intensity they bring to every session.
Now stop reading and go train.
Ready to build your home calisthenics setup? Browse the complete equipment lineup at Bold Body Fitness and start training like the athlete you want to become.